 In Part One we covered the beginning stages 1-4 of your kitchen remodel project. In Part Two we’re getting down to show time! 5. Specifying Your Fixtures and Finishes And you’ve been looking at and saving photos of things you like. You know if you want classic white cabinets, a natural wood finish or a paint color. The big day will come when you need to make your final specifications. This might be a little scary but if you’ve done your homework it shouldn’t be white knuckle time. Take a deep breath, you cando this. 6. Design finalization and construction documents This is the day your design is finalized, and your final floor plans, elevations and details are finished. If it is a full-out remodel your mechanical and electrical plans and your lighting plan will be done too. 7. Contractor Estimates You need to get a contractor to take your project from the design board to the finish line. Get at least three contractor estimates. There’s more to this than the lowest bid. You want to check your contractors out and make sure there are no complaints filed against them and that they have a rep for good work and completion of the job. 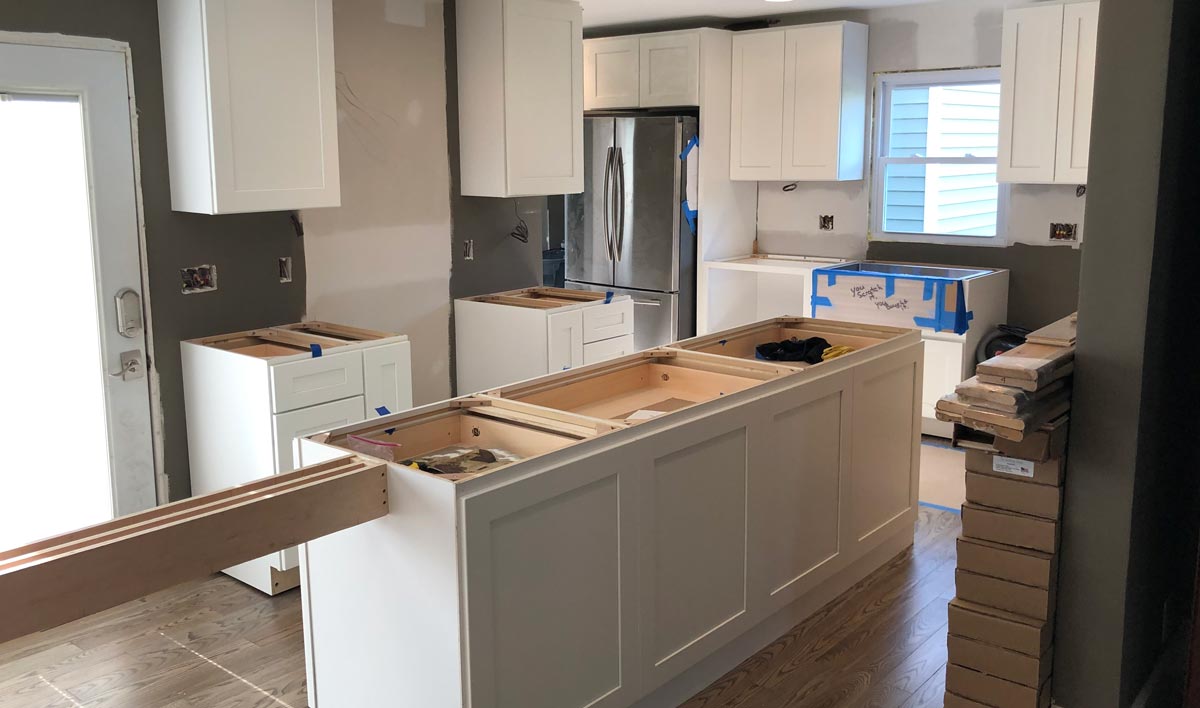 8. Prepare for demolition
This is the part we all hate but it’s show time! It’s usually about four to eight weeks after the permits are submitted. The work begins and it’s messy and inconvenient but necessary. Clean out the cabinets and store what you don’t absolutely need. Set up a temporary kitchen and be prepared to live on take-out and order-in a lot. Some homeowners arrange to stay somewhere else but most grit their teeth and bare it. 9. Handle the punch list When construction is about over there’s usually a list of things that are wrong, forgotten, or missing. These might be a wrong paint color, a missing switch plate, a faulty exhaust system, dings, bangs, scratches — anything that isn’t right. Don’t wait until the contractor has packed up and left because you may not get him back. You and your family have been living with dust and noise for weeks, you’re ramen-noodled to death and you’re ready for this remodel to be over like last week. But these things happen, it’s Murphy’s Law, and try to stay calm. Do not resign yourselves to live with a switch that’s a ticket to nowhere or hidden behind the refrigerator, a dishwasher that can’t open without hitting a cabinet door, or a pull-out pantry that won’t pull out. Go through the entire kitchen trying everything out and write down anything that is not as it should be. Stay calm, stay cool but insist that these things are corrected before the job is considered over and the contractor moves on. Kitchen remodels can be scary. They can be taxing, inconvenient and nerve wracking. But in the end, worth it.
0 Comments
 Everything you need to know to have a successful kitchen remodel. Okay, it began with a thought, turned into a dream, and now it’s becoming a plan: a kitchen remodel. It’s exciting, it’s scary, it’s also confusing at times. Most homeowners barely know where to start. But fear not there’s help to guide you through this exciting, scary, confusing process. Once you’ve started planning and are ready to green-light the kitchen remodel it’s time to do the following.
 Next, part two of How to Remodel Your Kitchen.
 The kitchen island is the workhorse of the kitchen, but how much space do you need to add one? Kitchen islands are almost indispensable today. But unfortunately, one of the most frequent problem I see when homeowners go it alone is too much island, too little space. Sometimes with heartbreaking results. But don’t worry, with good planning a kitchen island that meets the building codes can be yours. Most homeowners have no idea just how much space a kitchen island takes. It’s not just a matter of the island itself, you need a lot of space all around it, as well, for a nice smooth workflow. Follow these tips to determine if you have enough room for an island in your kitchen. One Size Fits All? No. If your kitchen is small don’t automatically assume that an island isn’t possible. A good kitchen designer has many ways to make one work even where space is at a premium. The designer, first and foremost, will need to know the exact size of the kitchen and what’s already in it. Then he or she will consider how many people will be using it and for what. Will it be used for casual meals? Will it hold any appliances? Will it have a sink? And if it will be used for food prep, how far is the range or cooktop and ovens from the intended island? How to determine clearance Clearance is all-important when it comes to kitchen islands. In a rectangular shaped kitchen that’s 16 ½ feet wide and 19 ¾ feet long, for example, the cabinets would be located against one wall. The depth of the base cabinets would be about 25 inches with the countertop. The clearance zone is from this countertop edge to the island’s countertop edge. The clearance zone goes all around the island. The minimum clearance, not for a work aisle, is 3 feet. The clearance zone is not optional. It must be included for safety reasons and ease of work in the kitchen. Safety first A safe distance must be kept between the island and all of the cabinets and the appliances in the kitchen. All drawers, doors, dishwashers and ovens must open safely and without obstructing passage. The greatest offenders in a small kitchen are the dishwasher door and often the oven doors and cause headaches for both homeowners and designers alike. The dishwasher particularly, opens downward and can be a safety hazard if there isn’t enough passage space past it. So, more space has to be planned for these sides of the island. The National Kitchen and Bath Association (NKBA) recommends at least 42 inches between the island and appliances in a work aisle for one cook and at least 48 inches for two. Personally, if there are children or elderly family members, I allow 48 inches for safety sake. That, however, is up to the designer. 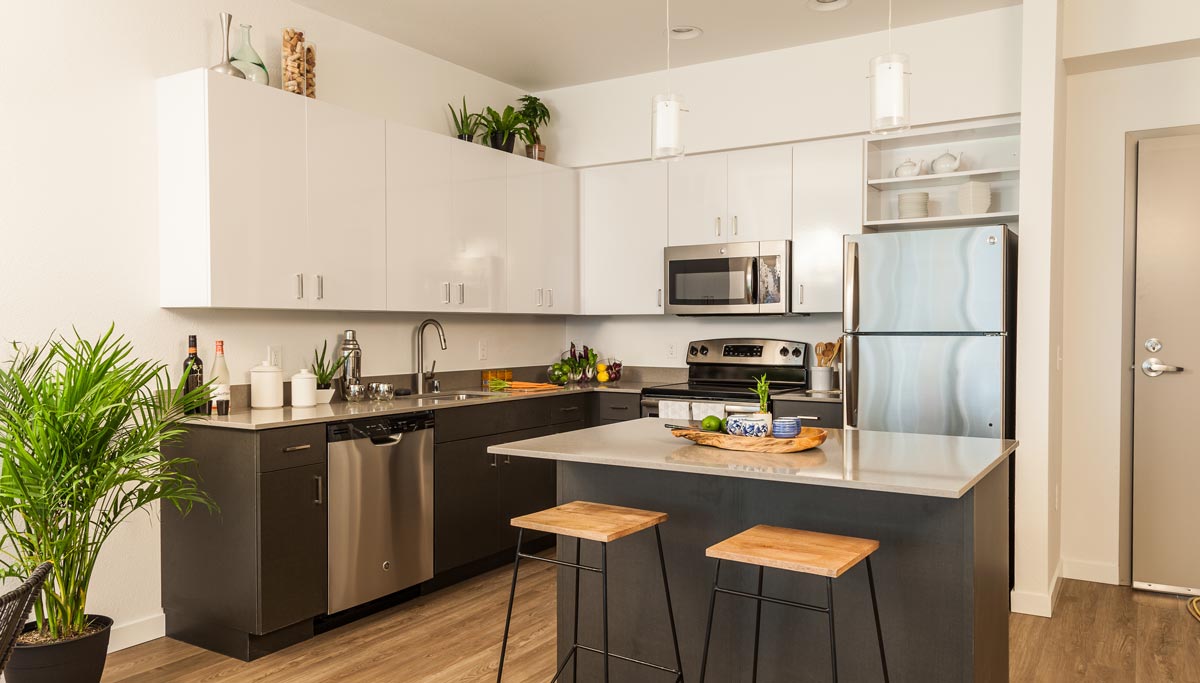 Islands for smaller kitchens
There’s an island for most kitchens and families. But the minimum recommended size of a fixed island is about 4 feet by 2 feet. This is small but still practical enough to serve a purpose, including small integrated appliances. Remember, the size of the island is primarily determined by the amount of space around it. If your space is just too tiny you could open up your layout which may mean taking out a wall or make use of butcher blocks on legs or small movable islands. These small changes can sometimes make a big difference in the efficiency of your kitchen. 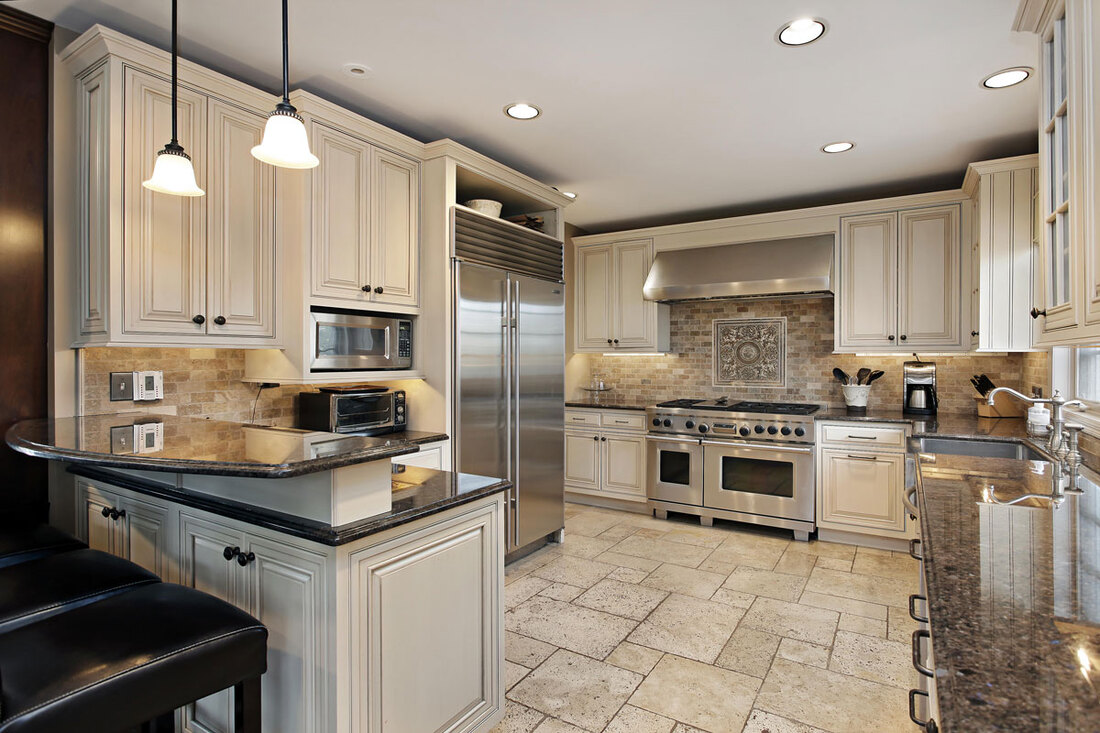 When feasting your eyes on the over the top kitchen photoshoots in the kitchen and bath design magazines have you ever thought ‘’we might be able to afford this if we do it ourselves?’’ I admit slashing the budget by doing the design and work yourself is tempting. But it’s not as easy to put one of those kitchens together as you might think. The kitchen is one of the most difficult and complicated rooms to design, the bathroom being the other. And designing a remodel is often by far more complicated than a kitchen in a new home. There are endless building codes and what might work in your space may not provide you with a functional kitchen. Above all a kitchen must be safe and easy to work in. And that’s what kitchen designers are for. We save you the time, expense and frustration of having to do parts of the kitchen over because it won’t pass inspection or it’s a nightmare to work in. A kitchen remodel, or even just a major facelift, is about more than just creating a beautiful space—it’s about creating a beautiful functional space. A good free kitchen design brings your ideas to life. The designer can also make your ideas work within the building codes and rules of design. When I re-design a kitchen that won’t pass inspection it’s almost always because the homeowner tried to squeeze too much into a space that just isn’t large enough. There are often too little space between the cabinets against the wall and the center island. Also, not enough cabinet space adjacent the refrigerator, sinks (for instance, 18 inches on one side and at least 24 inches on the other), cooktop or range (for example, at least 12 inches of countertop on one side and 15 inches on the other), or built-in coffee maker. There are often not enough electrical outlets for the amount of counter space or no outlet for the island. Or, very often, cabinets that will not fit in the space given. These are all things a kitchen designer can spare you, as well as, the extra expense of hiring a designer to re-design the kitchen and find a way to bring it up to code and then the cost of redoing much of the new kitchen. It’s heartbreaking for me and the homeowner alike.  The two most awesome things to hit kitchen design today is the 3D design renderings that allow the homeowner to see what their new kitchen will look like before they buy the tile that ‘’looked good in the store but…,’’ or the countertops that you ‘’thought was a good idea but...’’ And the second thing to revolutionize kitchen design is the Internet. You can get professional kitchen design online! You can DIY but you don’t have to go it completely alone and risk costly problems.
Today professional designers, like those at Walcraft, can give you advice, answer questions, help you solve kitchen problems all from the comfort of your own home. They can turn the space you have into a whole new space that’s beautiful, easy to work in, has what you need where you need it and including, if not all, certainly most of your ideas. And in the long run, you’ll end up saving money. |
Archives |
 RSS Feed
